

Tables
Working with tables in Keboola Storage — importing data, table and column naming rules, alias tables, metadata, and the Truncate Table and Delete Rows features.
The Table Storage for your project is available under the Tables & Buckets tab in the Storage section. All data tables are organized into buckets that can also be used to share tables between projects.
The actual data tables and the buckets are created primarily by Keboola components (data source connectors, transformations, and applications), or they are imported from CSV files. If you want to import data into an already existing table, the imported table must contain all the columns of the existing table, even if the existing table is empty. If any columns are missing, you will receive an error message similar to the following:
Some columns are missing in the CSV file. Missing columns: lat,long. Expected columns: lat,long.Please check if the expected "," delimiter is used in the CSV file.The imported file may also contain additional columns not present in the existing table. In that case, the columns from the imported table will be added to the existing table.
Table and column names can contain only alphanumeric characters. Dash and
underscores are allowed. Column names must not start or end with dash - or underscore
character _.
When you select a table from any bucket in Storage, detailed information about the table will be displayed at the top of the screen. This is what we refer to as the table detail throughout our documentation.
Aliases
Section titled “Aliases”Apart from actual tables, it is also possible to create aliases. They behave similarly to database views.
An alias does not contain any actual data; it is simply a link to some already existing data. Therefore, an alias cannot be written to, and its size does not count toward your project quota.
Alias tables are automatically materialized as physical database VIEWs. This makes them fully accessible in workspaces and
transformations via read-only storage access — no input mapping configuration is required.
Filtered aliases are also supported; the filter condition is enforced as a WHERE clause in the VIEW.
In linked buckets, alias VIEWs from the source project are automatically mirrored to the destination project,
making them immediately queryable there as well.
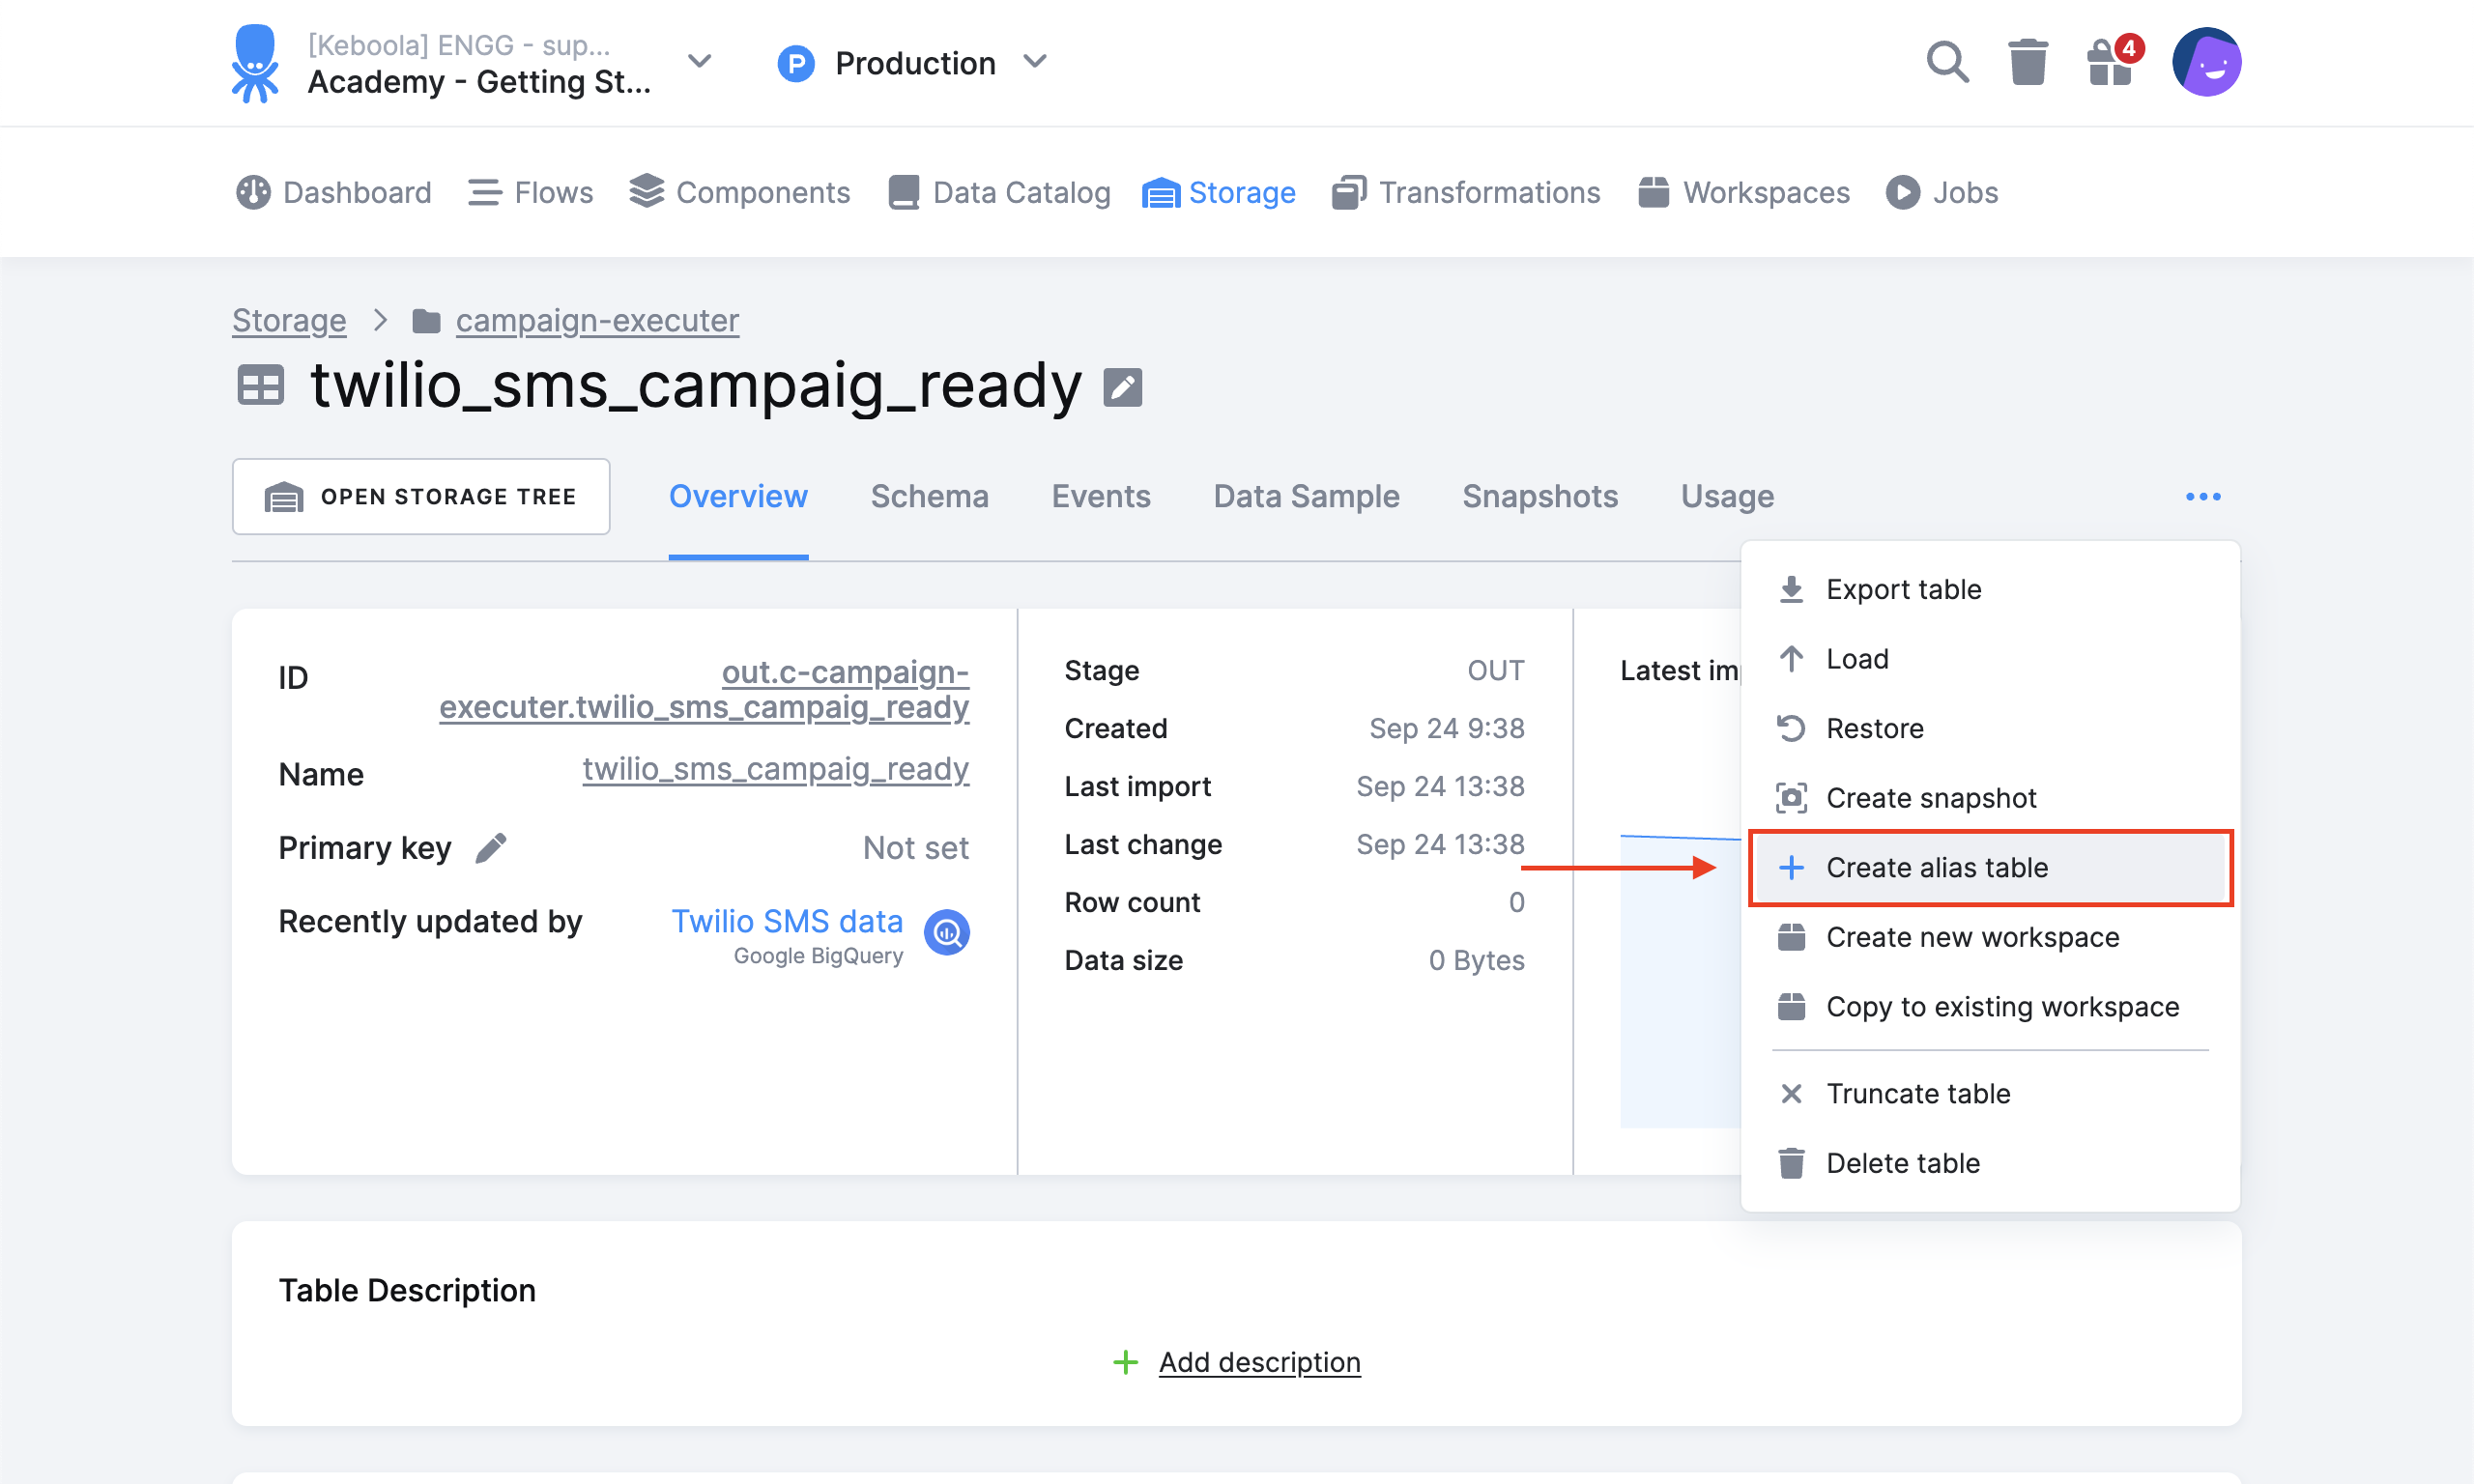
To create an alias table, go to the table detail, click the three dots on the right side of the screen, and select the ‘Create alias table’ option.
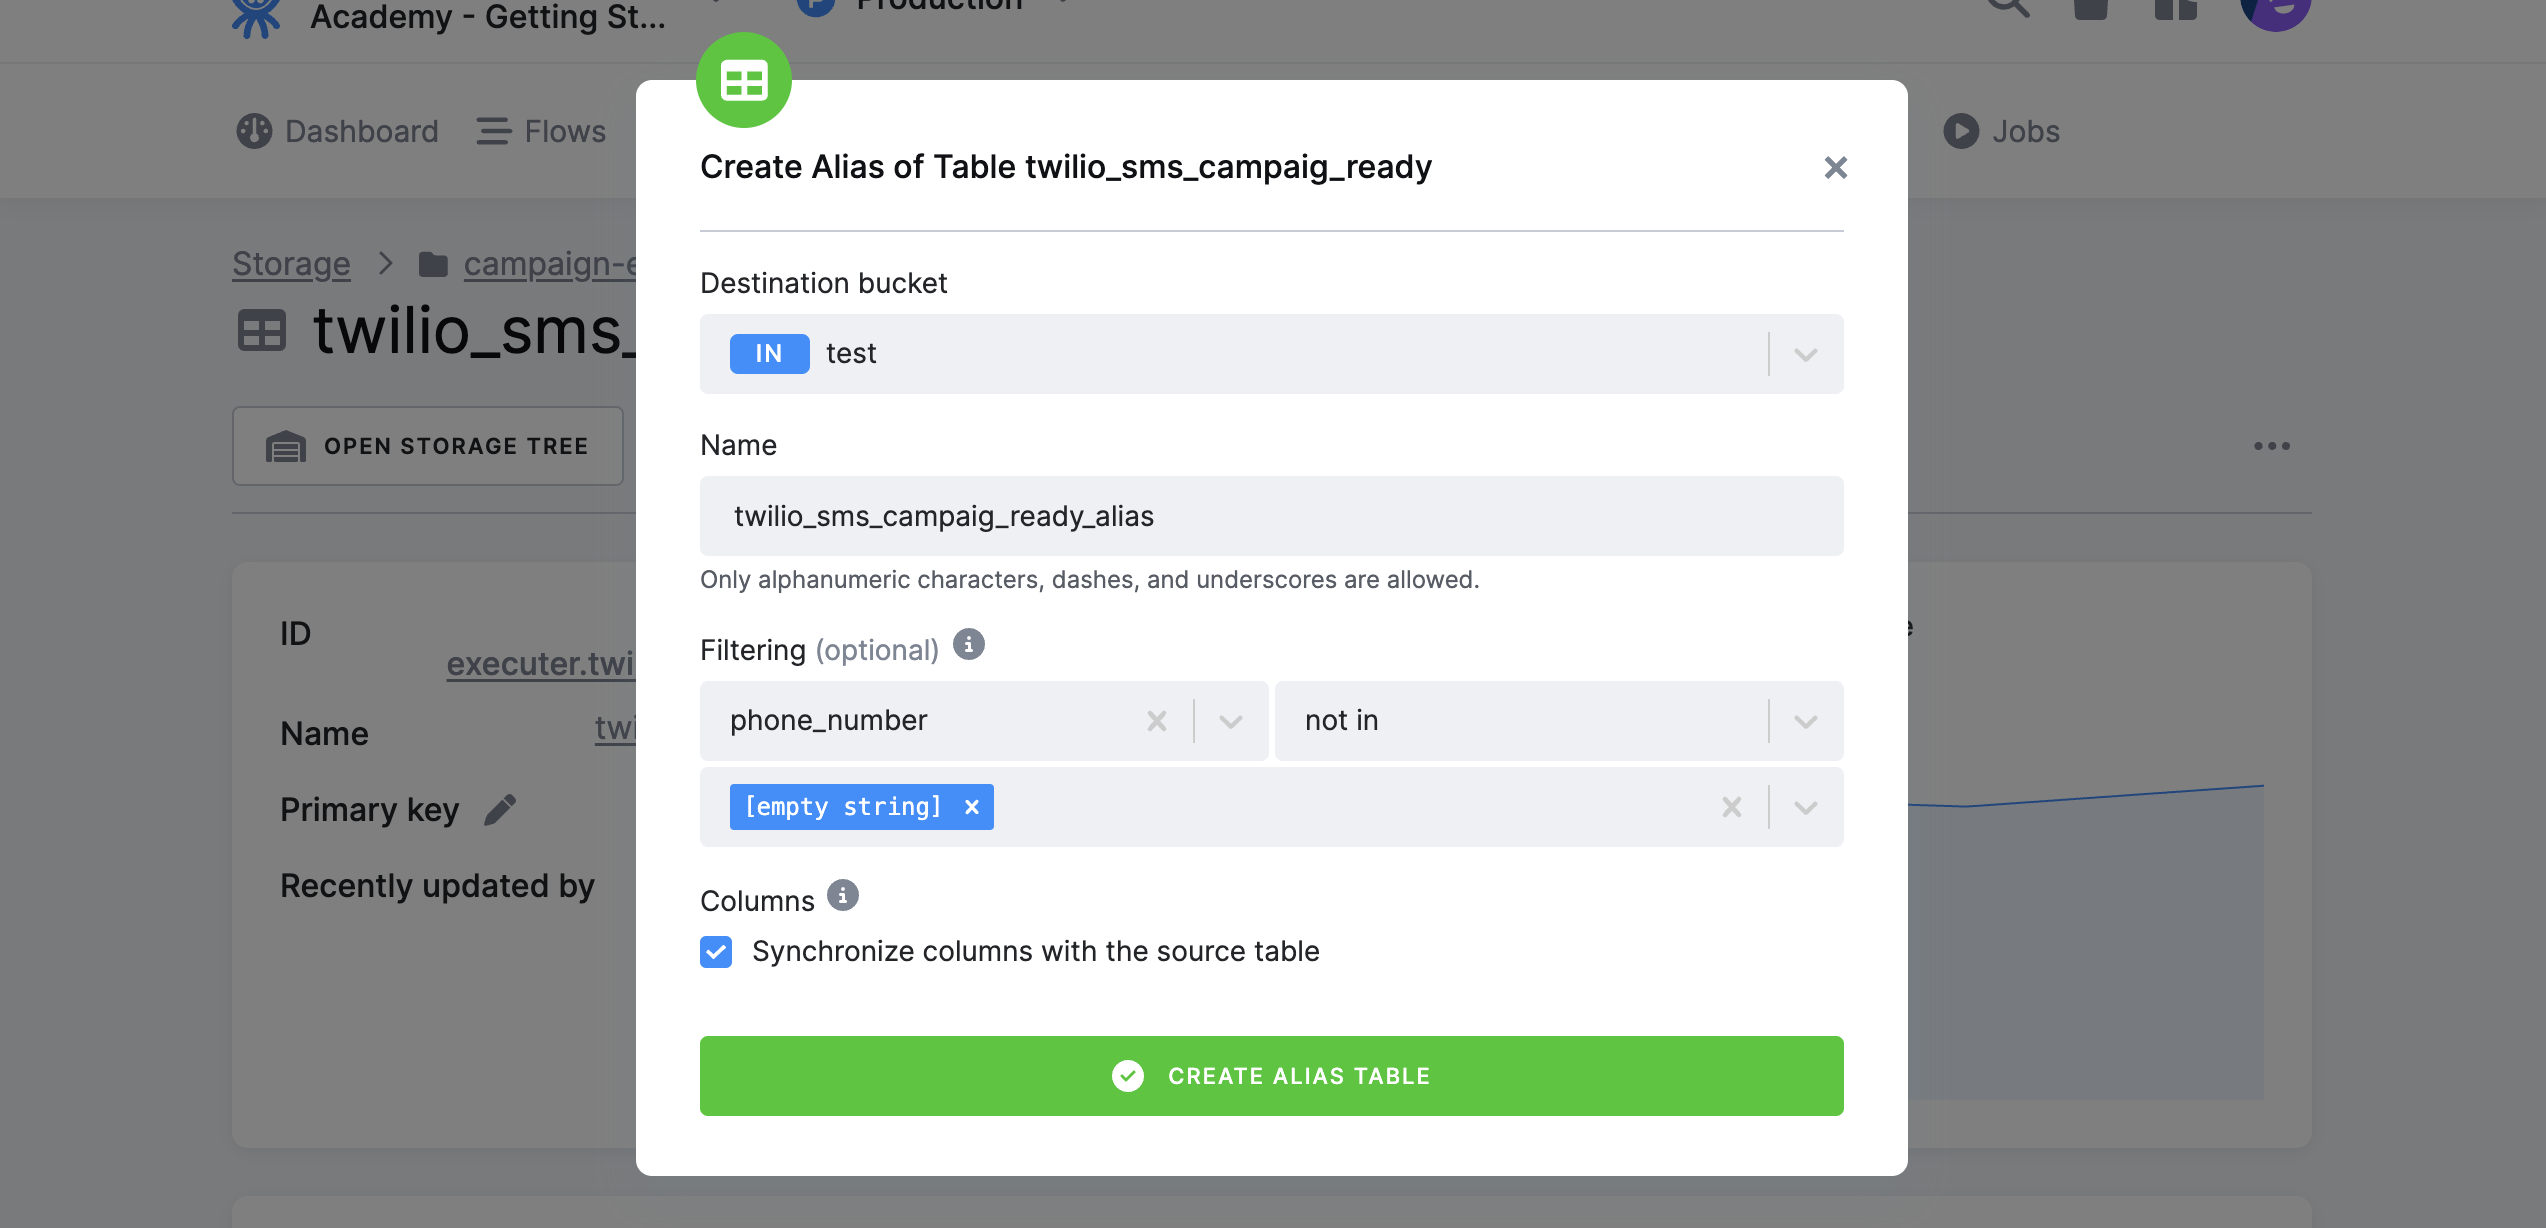
An alias table can be filtered by a simple condition.
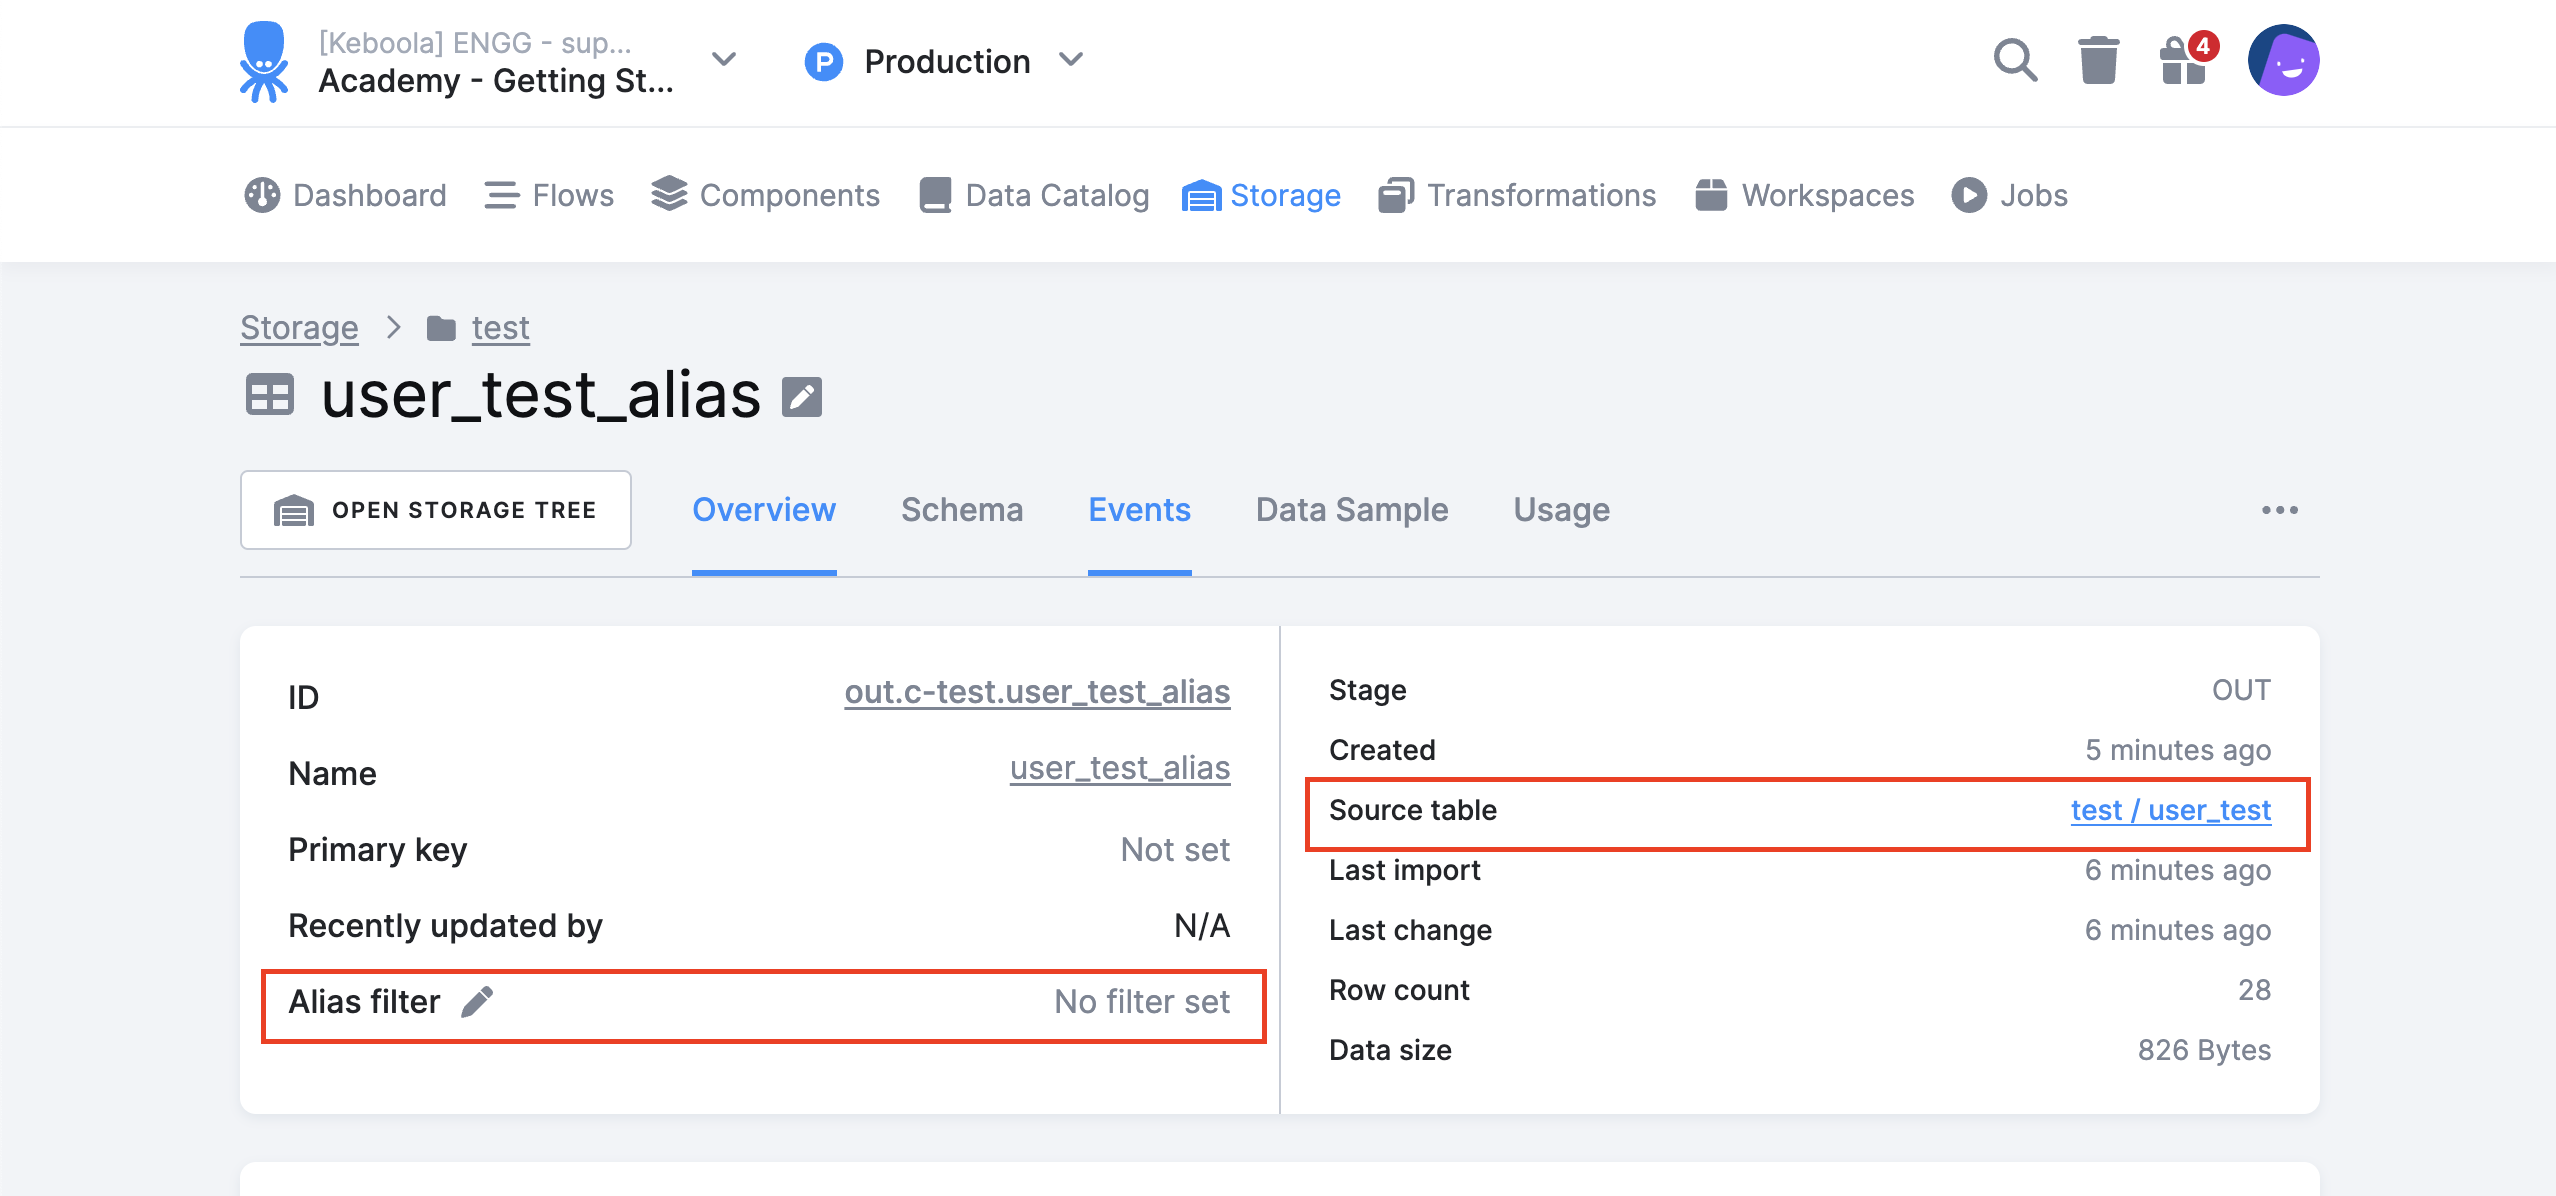
The table detail of an alias table contains additional information, including a reference to the source table from which it was created and any filters applied to the alias. Note that you can adjust the alias filters even after the alias table has been created.
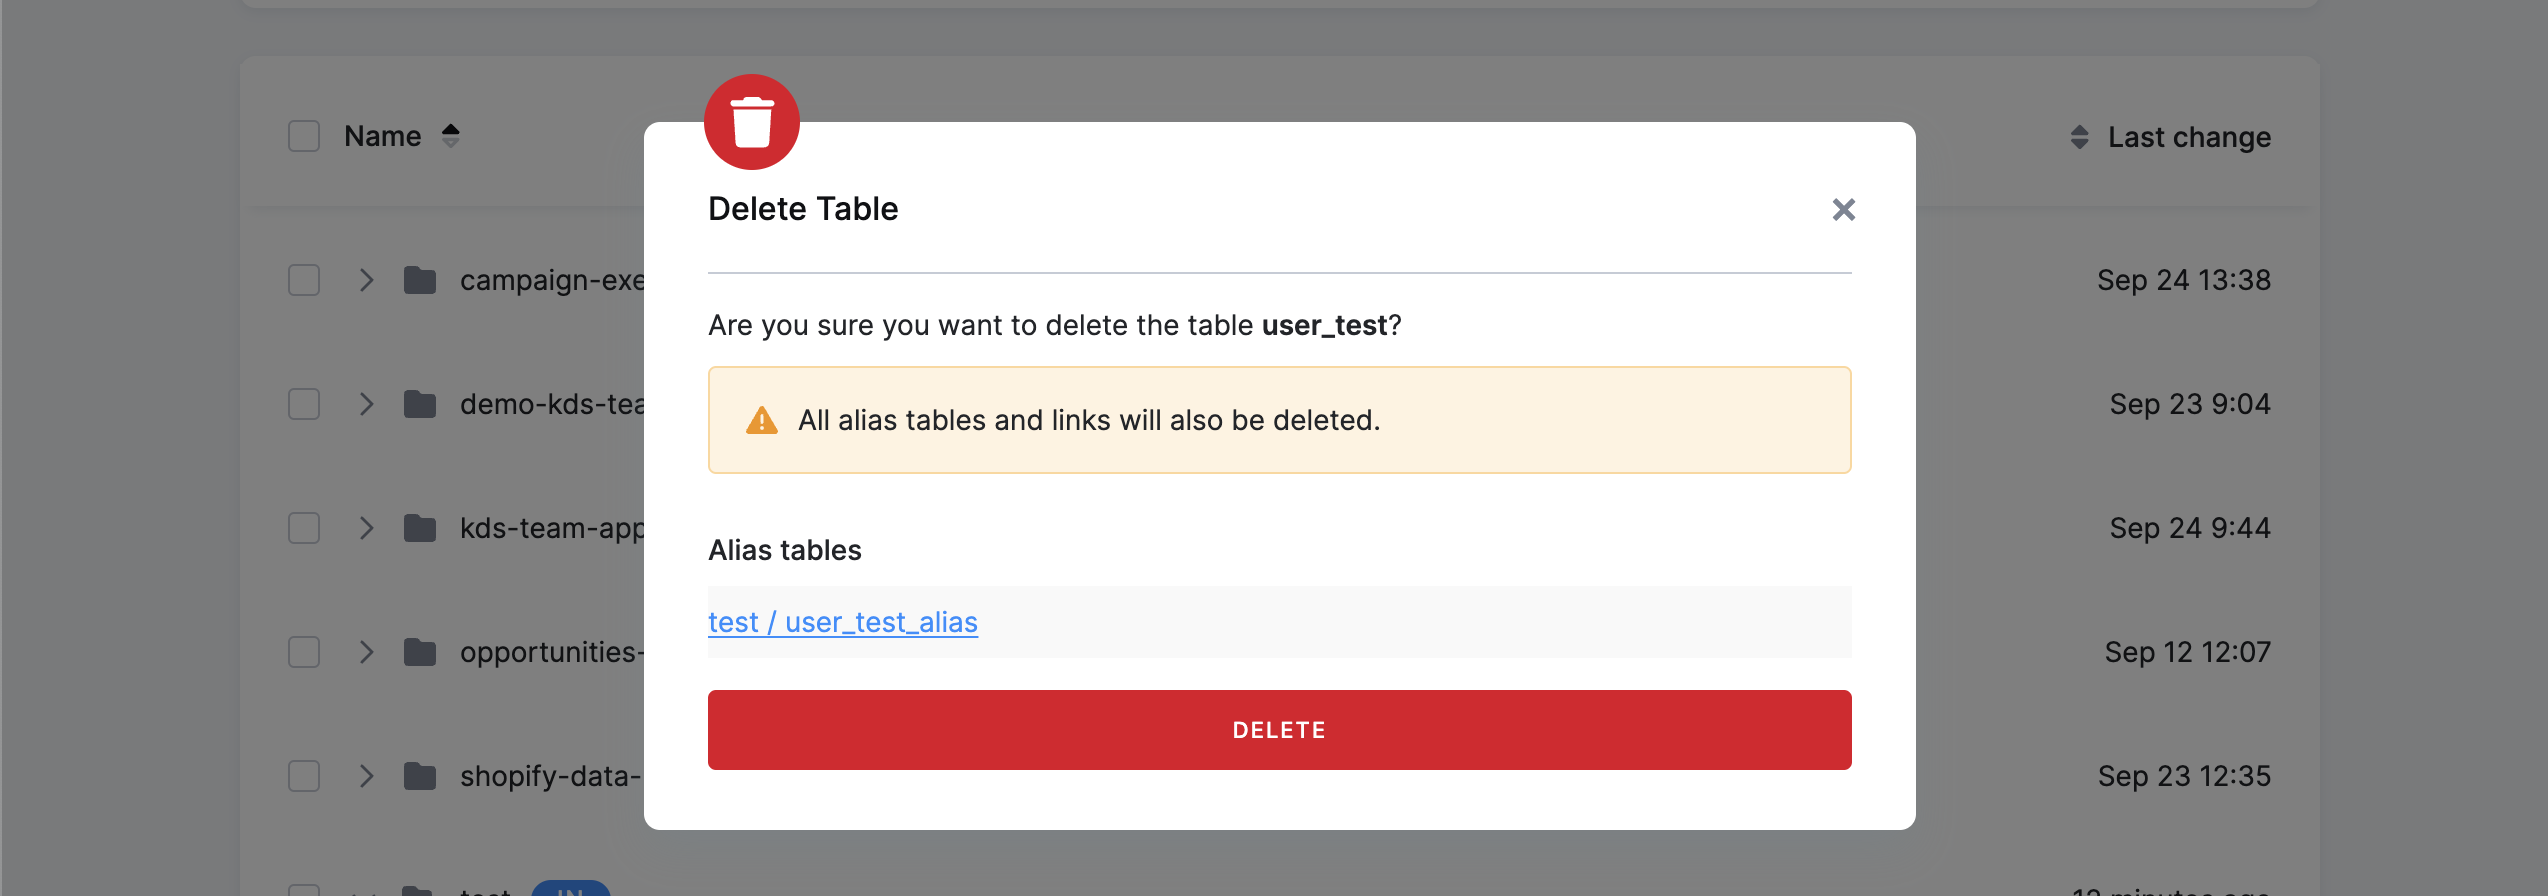
When attempting to delete a table with alias tables elsewhere in Storage, you will be prompted with a notification as part of the deletion process. The notification will detail the aliases (including links) connected to the table. You must confirm that you understand the aliases will be deleted as well before proceeding.
By default, alias columns are automatically synchronized with the source table. Columns added to the source table will be added to the alias automatically. You can prevent this by disabling Synchronize columns with source table.
Aliases with automatically synchronized columns and without a filter can be chained.
Metadata
Section titled “Metadata”Each Table Storage object (bucket, table, column) has an associated key-value store. This can be used to store arbitrary metadata (information about the data itself). Apart from arbitrary user-defined metadata, there is also some information stored automatically. For example, each bucket and table has information about which configuration of which component created them. One important use case of metadata is Column Data Types.
Primary Keys & Incremental Loading
Section titled “Primary Keys & Incremental Loading”Each table may have a primary key that identifies its rows: values are deduplicated on load, and with incremental loading new rows are added and existing rows updated instead of the table being cleared. Components can then use incremental processing to read only the rows changed since their last run.
These load behaviors have their own page — see Primary Keys & Incremental Loading.
Truncate Table
Section titled “Truncate Table”Overview
The Truncate Table feature removes all records from a table while preserving its schema (column structure and metadata). The feature deletes all rows but keeps the table structure intact. Primary keys or metadata remain without change. The feature is highly efficient especially when replacing an entire dataset.
When to Use Truncate Table?
- Replacing data completely (e.g., daily refresh of customer records).
- Ensuring clean data ingestion without duplication.
- Automating scheduled table resets (e.g., overwriting temporary datasets).
How to Truncate a Table
Section titled “How to Truncate a Table”- Navigate to Storage → Tables & Buckets.
- Select the table you want to truncate.
- Click the three dots on the right side of the screen. A drop-down menu will display.
- Select “Truncate table”. A warning information will display.
- Confirm clicking the “Truncate table” button.
Delete Rows
Section titled “Delete Rows”Overview
The Delete Rows feature allows you to remove specific records from a table in Storage. Unlike Truncate Table, which clears all data, Delete Rows selectively removes only matching records, keeping the rest of the table intact.
When using the Delete Rows feature, you can apply multiple filters in a single execution, such as:
- Rows changed within a specific period.
- Rows containing a specific value in a given column. Before deleting the rows, Keboola displays a preview of the records that will be removed based on your filters.
When to Use Delete Rows?
- Removing outdated records (e.g., inactive customers).
- Correcting erroneous data entries.
- Synchronizing data with external systems (e.g., deleting stale records).
How to Delete Rows
Section titled “How to Delete Rows”- Navigate to Storage → Tables & Buckets.
- Select the table where you want to delete rows.
- Click the three dots on the right side of the screen to open a drop-down menu.
- Select Delete rows. A pop-up will appear.
- Set up the filters to specify which rows should be deleted.
- Click “Delete rows” to confirm.